Obsidian丨笔记模板参考
经验丨如何进行文献阅读 2.0得到了很多小可爱的喜欢,所以萜妹准备新开个系列,分享我自己搭建这套系统的细节,以及一些经验。
今天来介绍我的笔记模板。
基本介绍
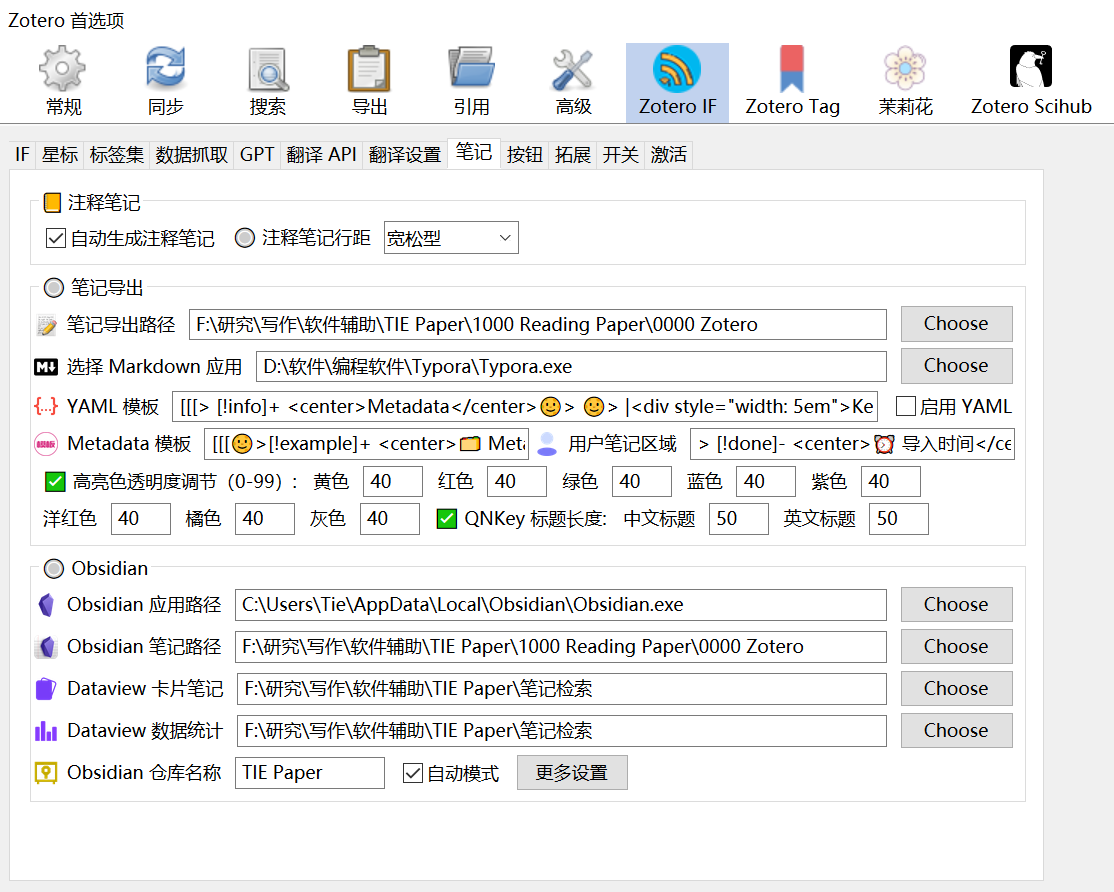
核心插件: Zotero IFs +Zotero integration
我目前是以 Zotero IFs为主,Zotero integration 为辅进行我的笔记管理。
因为我EndNote转到Zotero比较晚,所以我没有使用过早期的Zotero和Obsidian的联动软件。
我第一个接触的是Zotero integration。但当时苦于Zotero integration无法实现Obsidian和Zotero的实时联动,于是我怒冲了青柠学术的Zotero IFs,选择花钱节约时间。
不过Zotero IFs 非开源,它有些底层逻辑无法修改。因此,我仍会使用Zotero integration辅助。
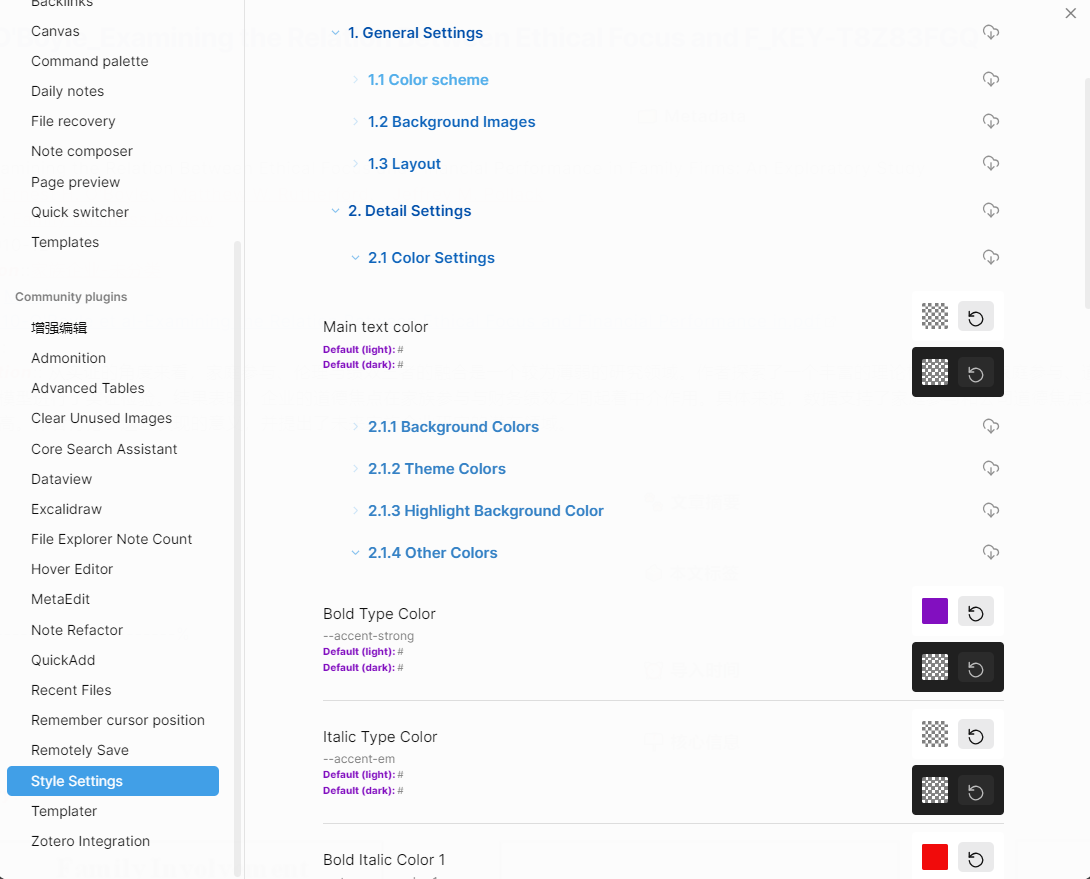
主题样式
我目前使用的是Blue Topaz主题。
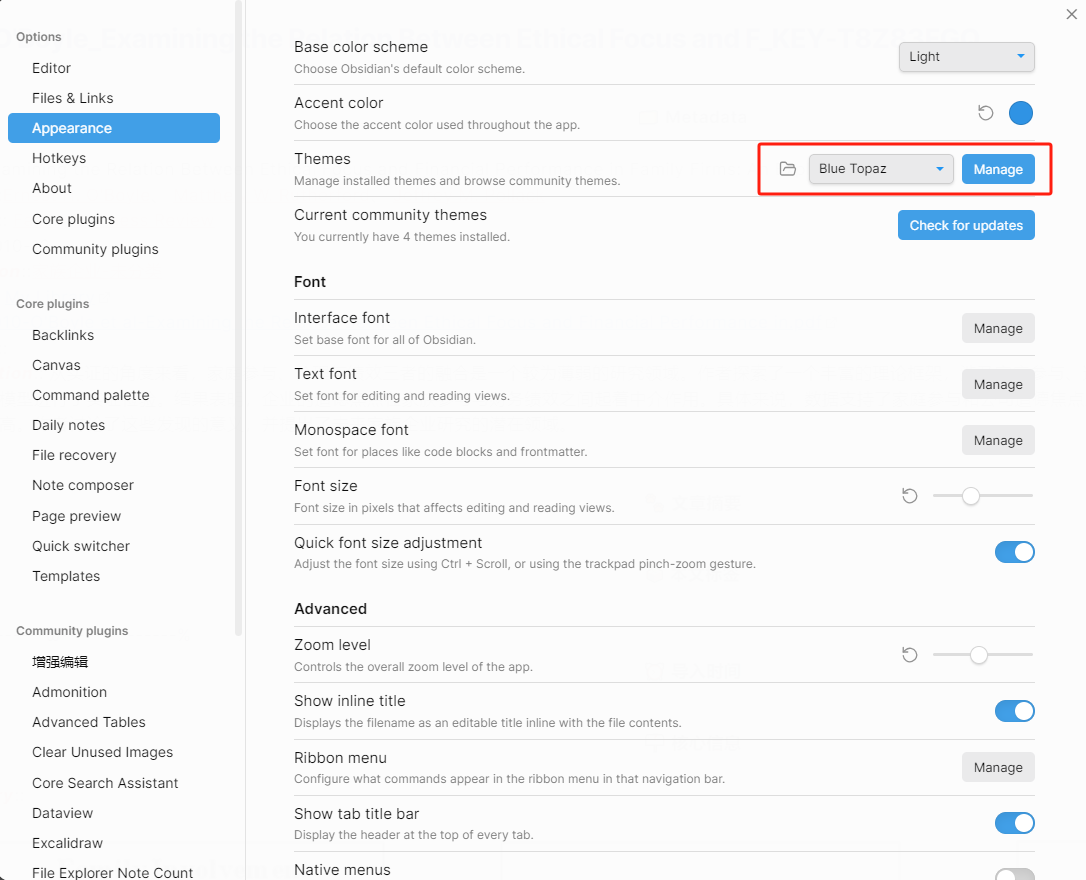
并利用了Style Settings插件进行了个性化的颜色修改,所以可能和obsidian的默认样式会有些不同。
上次有人问我为什么代码一样,呈现结果不一样时,我才想起来应该和大家先介绍一下这点。
基本模板
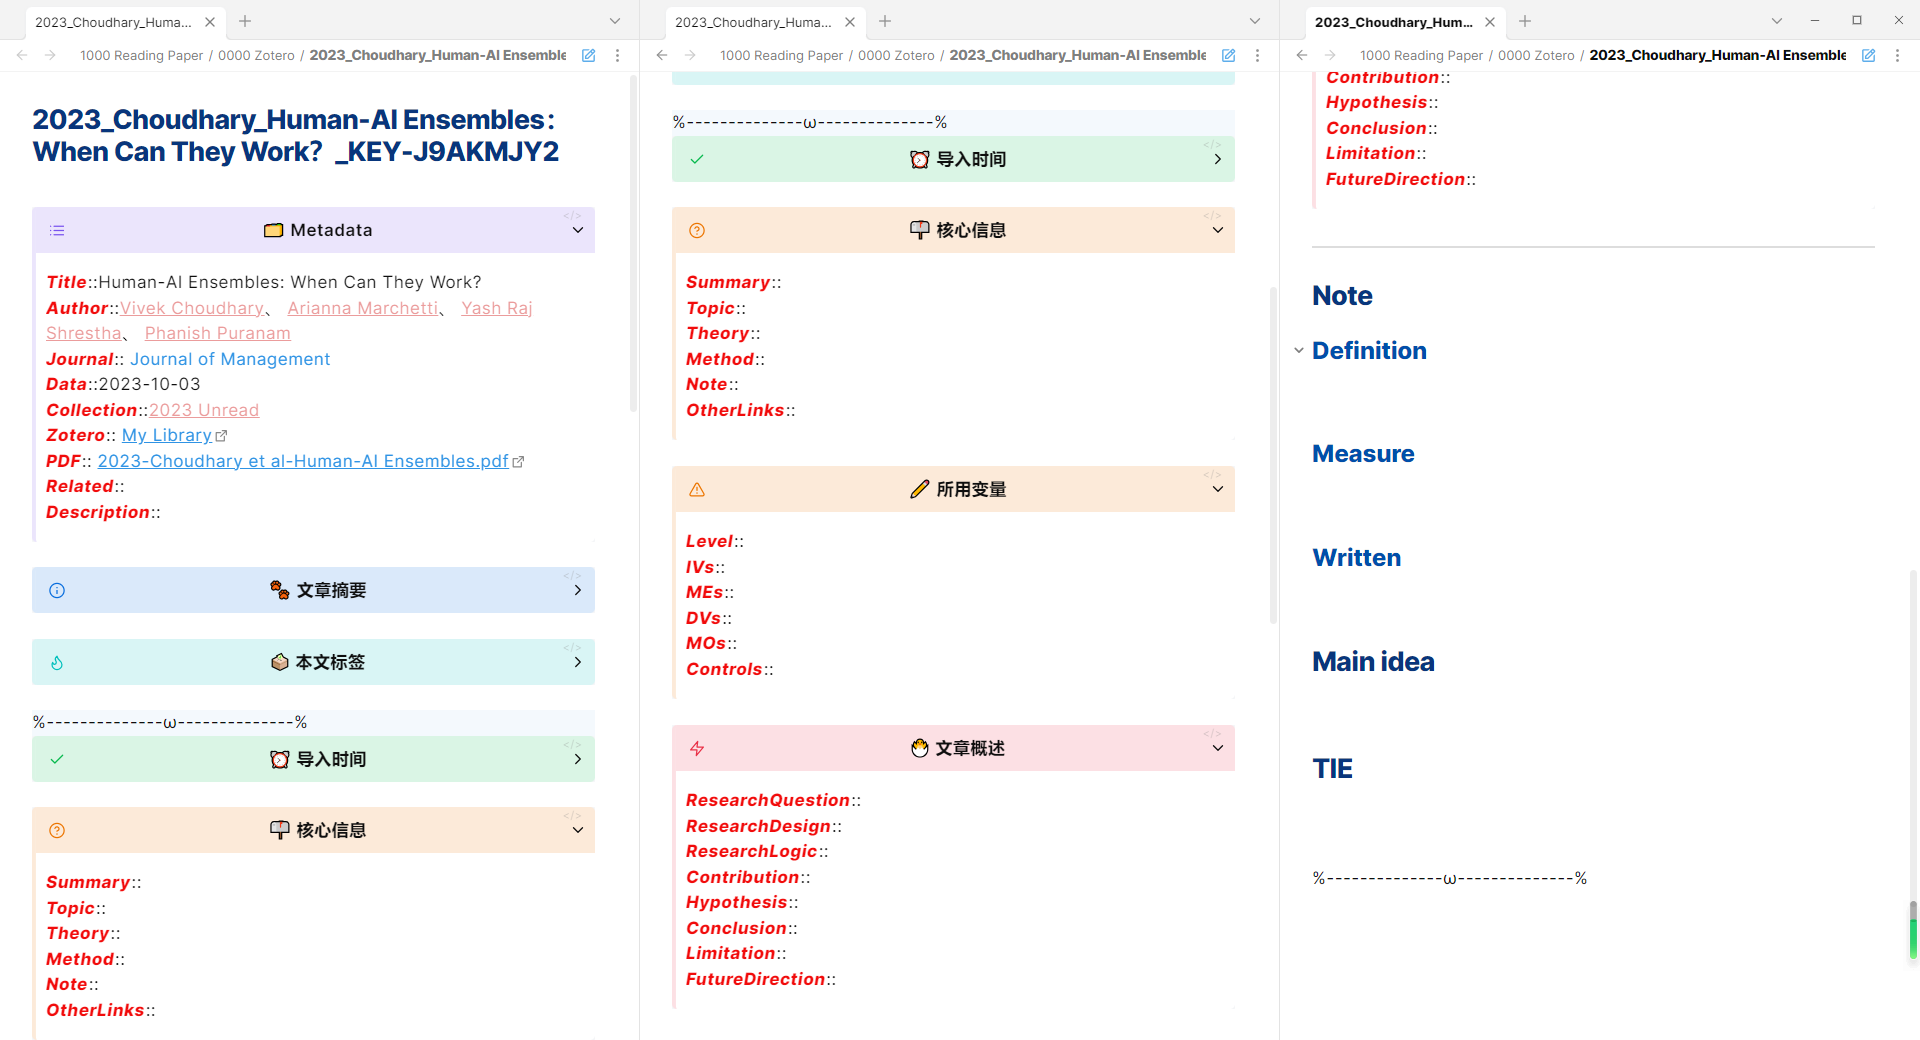
我的笔记整体模板还是依托于Zotero IFs。Zotero IFs的笔记分为3个区域,分别是信息区、笔记区和注释区。在具体笔记中以【%—ω—%】分隔。
其中信息区和注释区会根据Zotero自动生成、同步更新,而笔记区一旦导出就不会再更新了。
- 信息区,对应Metadata模板
- 笔记区,对应用户笔记区域
- 注释区会自动同步Zotero中的注释,无需我们另外设置模板。
信息区
具体代码:
[[[🌝>[!example]+ <center>🗂️ Metadata</center>🌝> 🌝> ***Title***::{{title}}🌝> ***Author***::{{creators}}🌝> ***Journal***:: {{publicationTitle}}🌝> ***Data***::{{date}}🌝> ***Collection***::{{collection}}🌝> ***Zotero***:: {{itemLink}}🌝> ***PDF***:: {{pdfLink}}🌝> ***Related***:: {{related}}🌝> ***Description***:: {{callNumber}}🌝🌝> [!info]- <center>🐾 文章摘要</center>🌝> 🌝> ✏️ {{abstractFormat}}🌝🌝> [!hint]- <center>🗳️ 本文标签</center>🌝> 🌝> {{tags}}]]]
自动生成的结果:
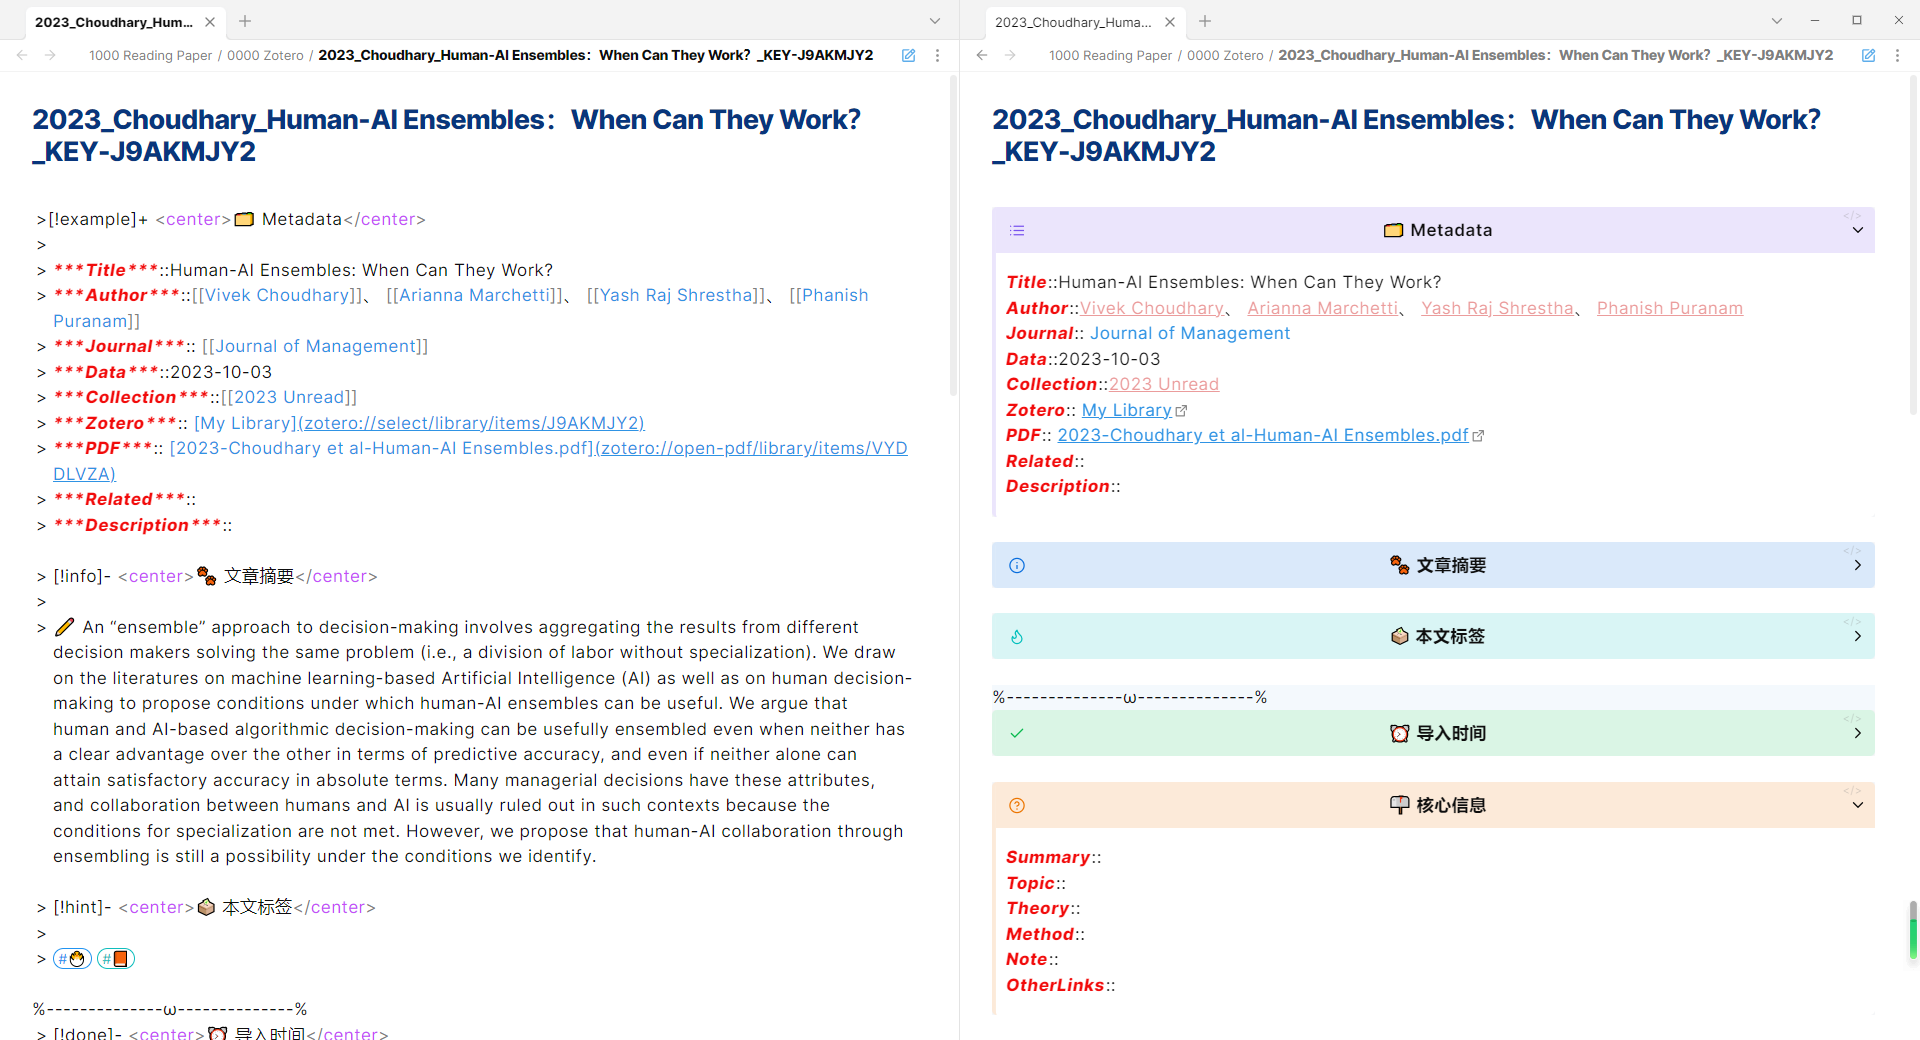
这里记录着文献的基础信息,都能在Zotero中得到对应属性,具体详见:https://www.yuque.com/qnscholar/zotero-if-pro-max/sol94e
大家可以根据自己的习惯,调整属性。
🌝 在自动生成时会替换为回车。
Tips:
【标题样式】 每个小标题的样式也可以自行修改。只需要修改[!XXX]中的XXX,即可匹配上预先的样式。更多样式可参阅:https://help.obsidian.md/Editing+and+formatting/Callouts
【内容展开】 可以看到,摘要和标签部分我都是默认折叠的。语句的区别在于[!XXX]后紧接的符号:
- +,默认展开;
- -,默认折叠。
【呈现形式】 为了便于查看,我的笔记模板有一些非功能性语句,比如代表斜体加粗的“***”。这对后期的数据查找没有影响。
笔记区
具体代码:
> [!done]- <center>⏰ 导入时间</center>🌝>🌝> ImportDate:: {{dateCurrent}}🌝🌝> [!question]+ <center>📫 核心信息</center>🌝>🌝> ***Summary***::🌝> ***Topic***:: 🌝> ***Theory***:: 🌝> ***Method***:: 🌝> ***Note***:: 🌝🌝> [!warning]+ <center>✏️ 所用变量</center> 🌝>🌝> ***Level***:: 🌝> ***IVs***:: 🌝> ***MEs***:: 🌝> ***DVs***:: 🌝> ***MOs***:: 🌝> ***Controls***:: 🌝🌝> [!danger]+ <center>🐣 文章概述</center>🌝>🌝>***ResearchQuestion***::🌝>***ResearchDesign***::🌝> ***ResearchLogic***:: 🌝> ***Contribution***:: 🌝> ***Hypothesis***:: 🌝> ***Conclusion***:: 🌝> ***Limitation***:: 🌝> ***FutureDirection***:: 🌝🌝---🌝# Note🌝## Definition🌝🌝🌝## Measure 🌝🌝🌝## Written 🌝🌝🌝# Main idea🌝🌝🌝# TIE🌝🌝🌝
自动生成的结果:
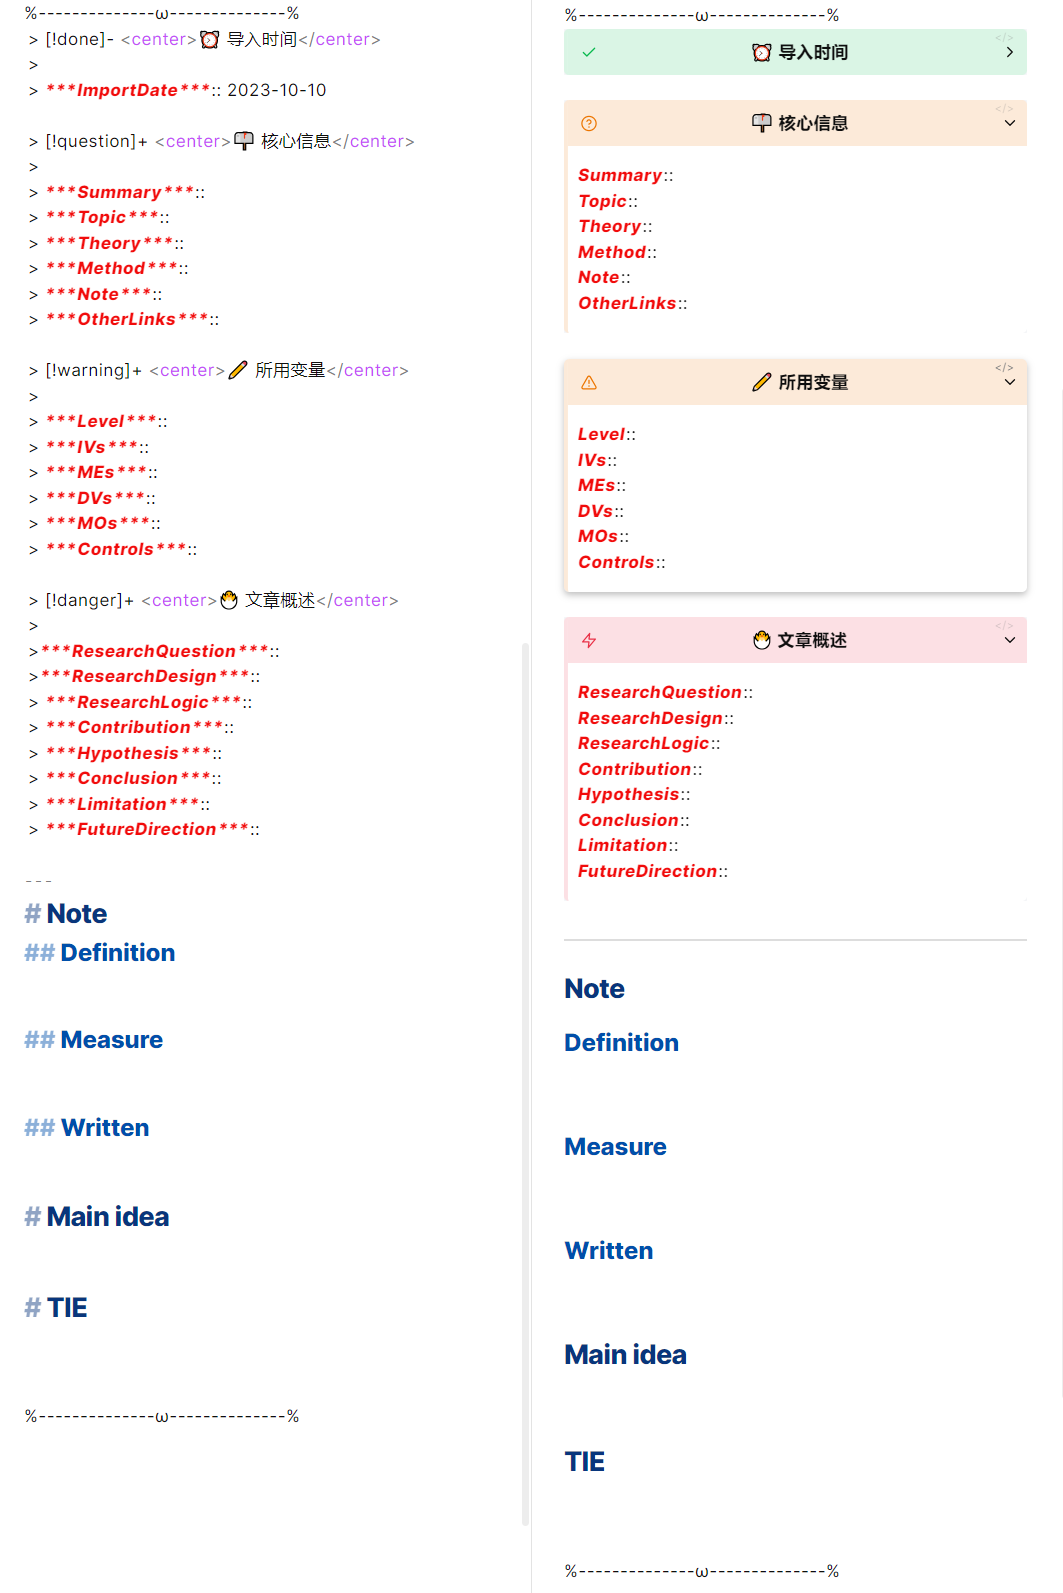
这里其实又可以分为两个部分,分别是核心笔记区与其他笔记区。
核心笔记区
核心笔记区类似于信息区,都是以属性的方式存在。大部分属性都顾名思义,需要额外说明的分别是:
- Summary:模型图或封面图
- Note:一句话概括文献
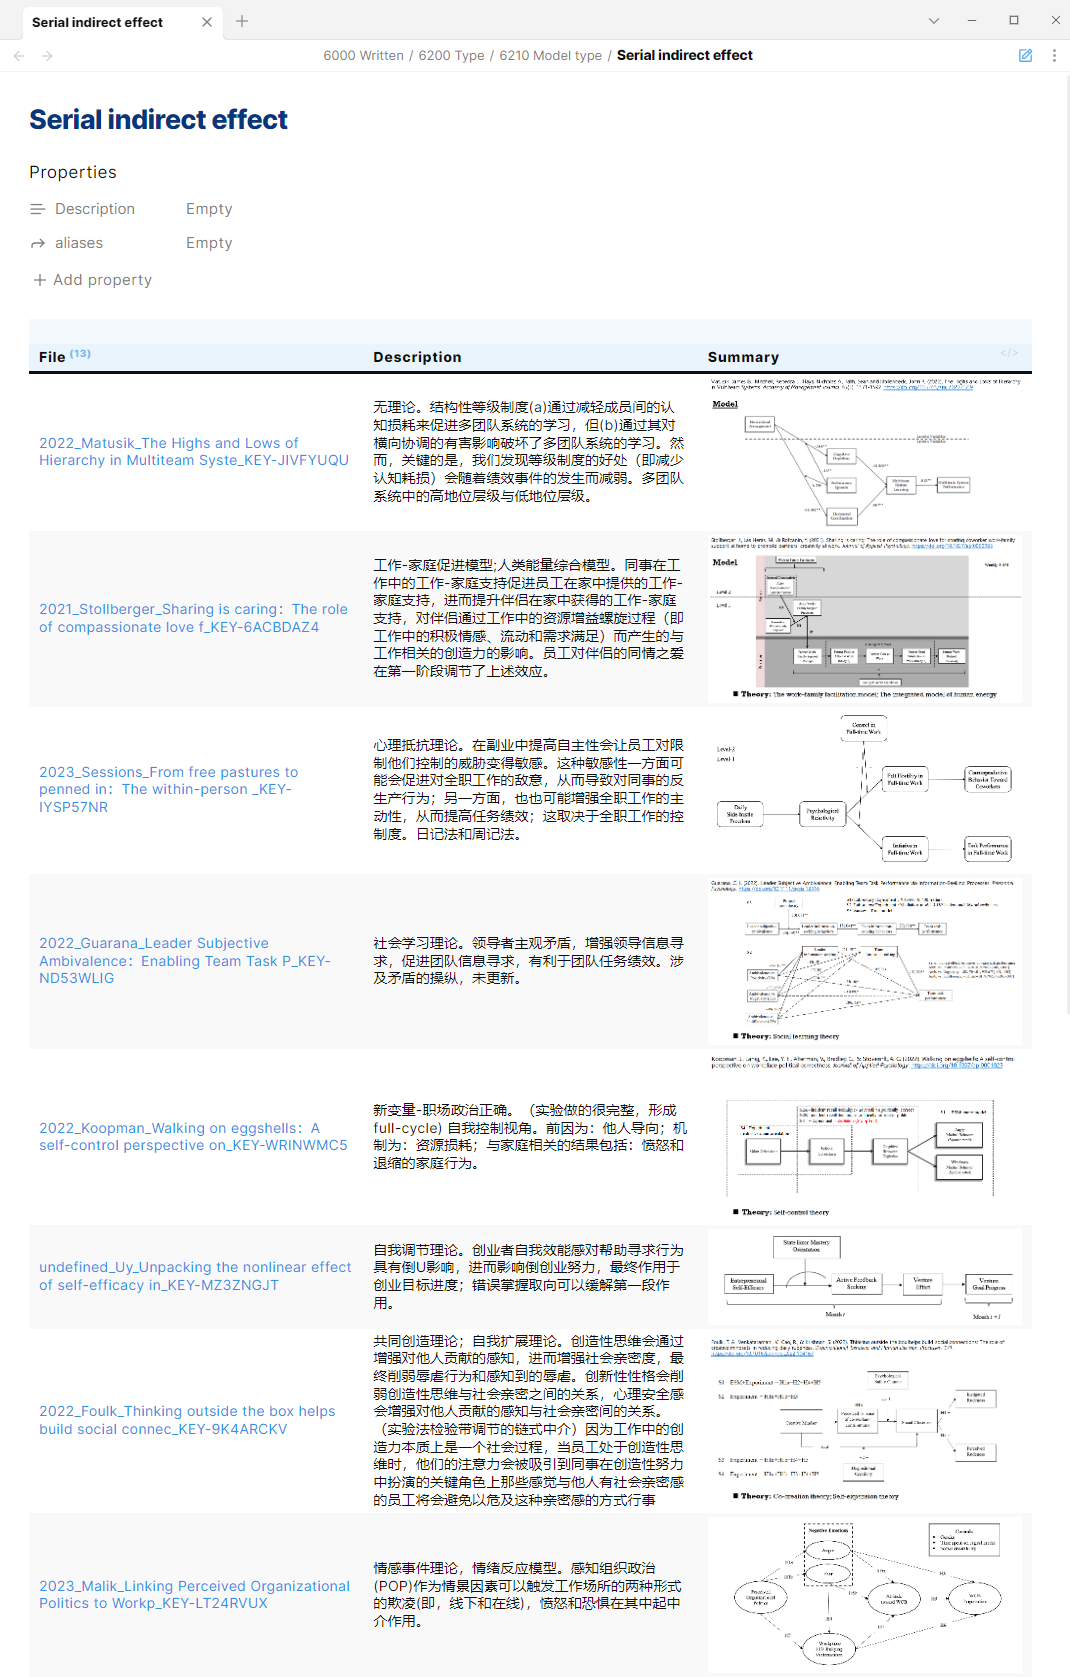
- OtherLinks:一些归不入其他属性的标签链接,如[[Serial indirect effect]]
这会比较有利于后续快速查找与预览。如,我想快速查看涉及到链式中介的文章,我就可以使用:
table Description, Summary
from  #_Serial_indirect_effect
快速找到目标文献,并通过概述与模型图迅速回忆。
不过,这个部分的内容无法从Zotero中自动生成,需要我们在阅读时手动补充。
其他笔记区
其他笔记区主要是文本记录,其下又包括:
- Note:负责素材记录,存放定义、测量工具、写作例句
- Main idea:存放文中主要观点,是个人详细的学习笔记
- TIE:存放一些个人思考。
这个部分也是需要我们在阅读时手动输入。
进阶技巧
Zotero integration
Zotero integration的大致逻辑是,从Zotero中提取信息(比Zotero IFs提取的更广泛),然后支持用户的个性化需求。
它提取出的信息是这样:
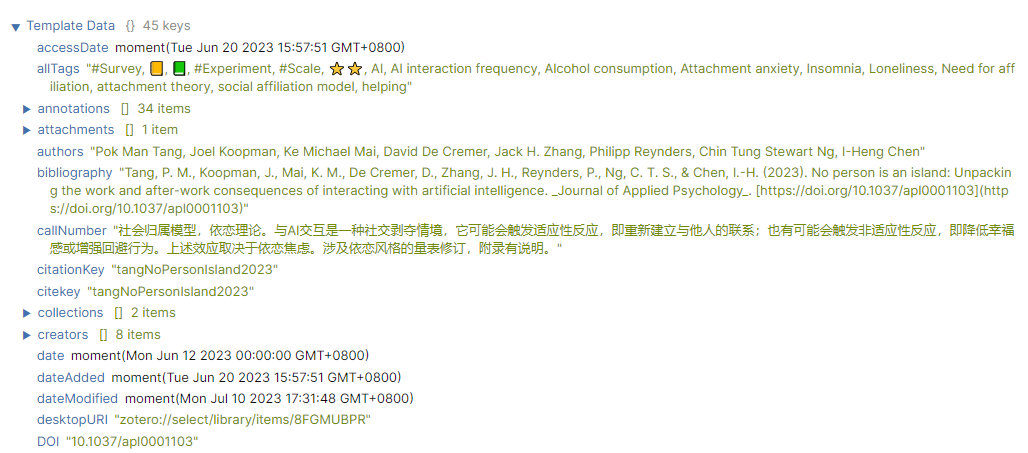
由于我们笔记区还有大量需要手动输入的工作,而很多内容其实在Zotero中有记录,只是利用Zotero IFs 无法自定义调取,所以我用Zotero integration补充了些自动化技巧。
将标签以[[]],而非# 的形式表示
个人比较喜欢使用[[]],所以我利用下列模板实现此功能:
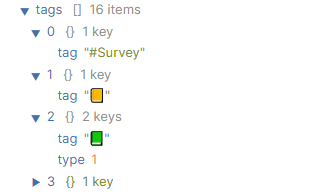
{% for t in tags %}[[{{t.tag|replace("#","")|capitalize}}]]{% if not loop.last %}, {% endif %}{% endfor %}
- {% for t in tags %}……{% endfor %},意为针对tags进行循环任务;
- capitalize,意为首字母大写;
- replace("#",""),意为将“#”替换为“”;
- t.tag|……,意为针对t.tag属性进行任务;
- [[]],意为链接化;
- {% if not loop.last %}, {% endif %},意为如果是最后一个则停止循环。
此处的语句可解读为,针对tags进行循环任务,将每一个t.tag属性的“#”替换为“”,并将其链接化,直到最后一个tag结束循环。

素材的半自动整理
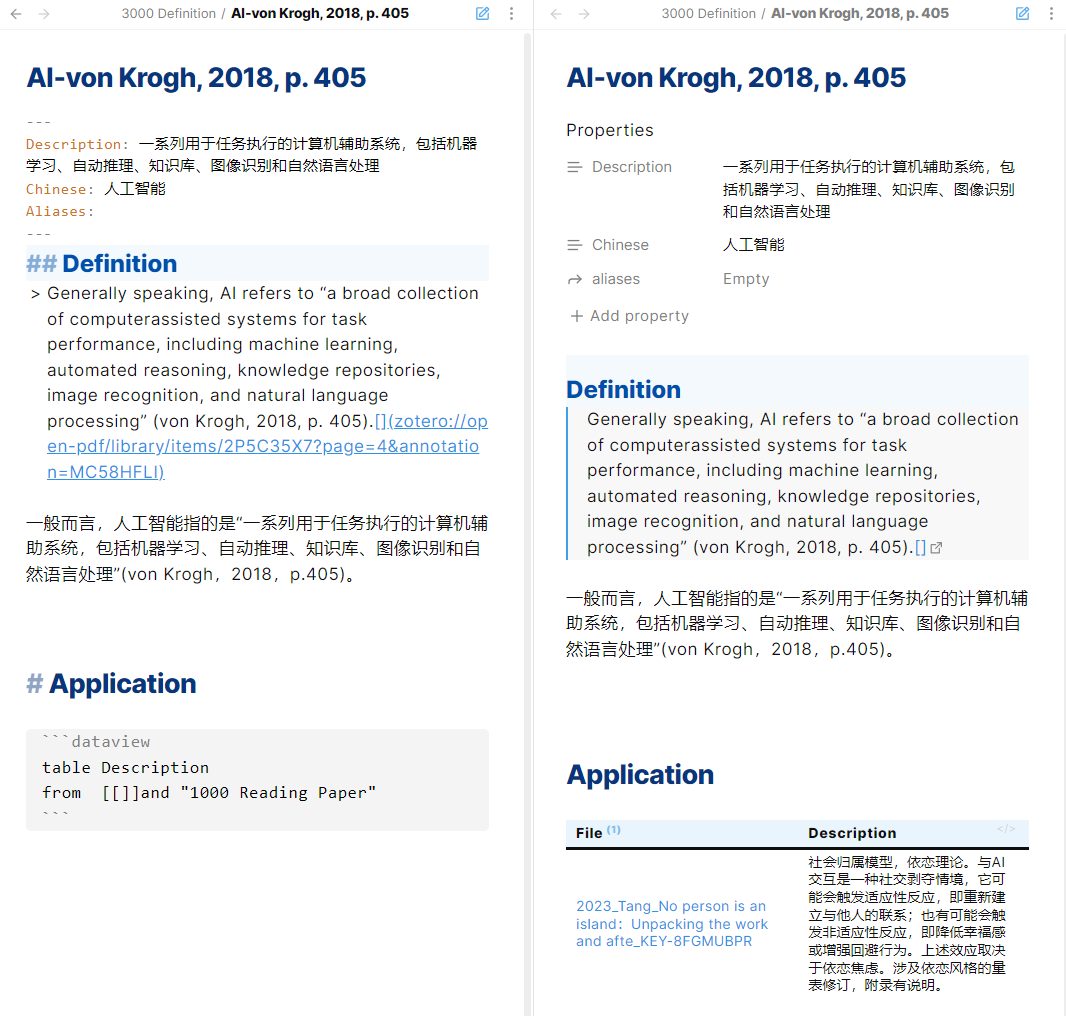
首先,我在Obsidian中的定义模板如下。
Chinese: (变量名)
Description: (译文)
## Definition
> (原文)
(译文)
## Origin
Reference::
## Application
```dataview
table Description
from [[]]and "1000 Reading Paper"
```、
译文与原文已储存在Zotero的注释里。
所以我可以按照tag的语句来写来进行循环调用下的具体内容。
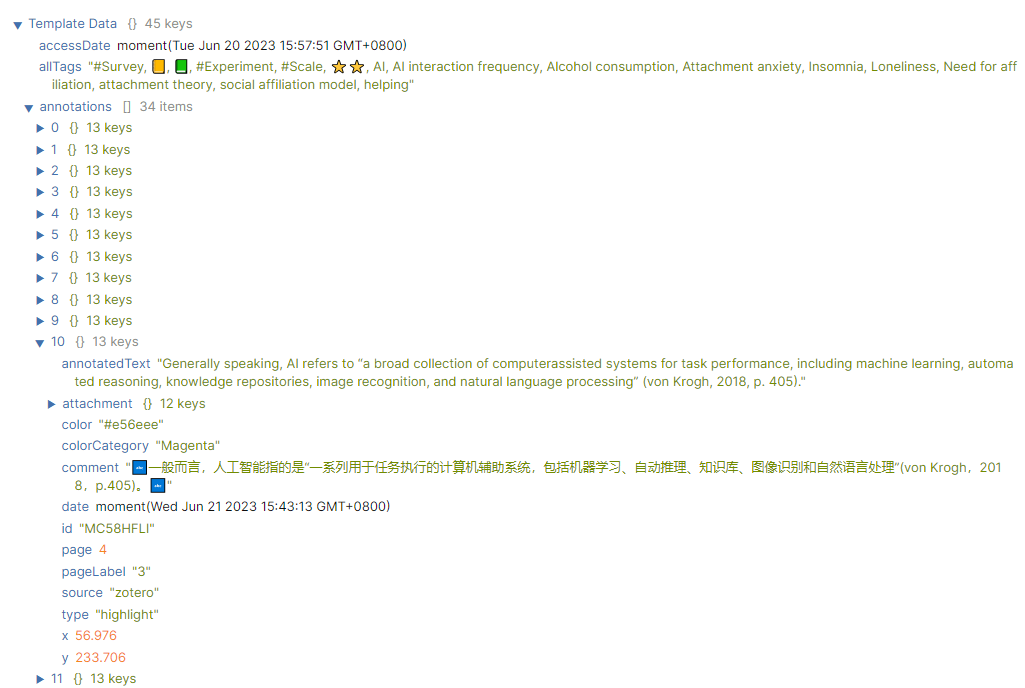
Chinese:
Description: {{annotation.comment|replace("🔤","")}}
## Definition
> {{annotation.annotatedText}}[](zotero://open-pdf/library/items/{{annotation.attachment.itemKey}}?page={{annotation.page}}&annotation={{annotation.id}})
{{annotation.comment|replace("🔤","")}}
而由于我将定义都设置为了洋红色(#e56eee),所以我们可以根据注释颜色写循环语句:
{% for annotation in annotations %}{% if annotation.color == "#e56eee" %}

……

{% endif %} {% endfor %}

然后再进行手动调整。
测量与写作模板的自动化思路也差不多,所以就不展开啦。
完整模板
最后附上我的Zotero integration模板供大家修改。
# Tags
{% for t in tags %}[[{{t.tag|replace("#","")|capitalize}}]]{% if not loop.last %}, {% endif %}{% endfor %}
# Note
## Definition
{% for annotation in annotations %}{% if annotation.color == "#e56eee" %}
Chinese:
Description: {{annotation.comment|replace("🔤","")}}
## Definition
> {{annotation.annotatedText}}[](zotero://open-pdf/library/items/{{annotation.attachment.itemKey}}?page={{annotation.page}}&annotation={{annotation.id}})
{{annotation.comment|replace("🔤","")}}
## Origin
Reference::
## Application
```dataview
table Description
from [[]]and "1000 Reading Paper"
```、
{% endif %} {% endfor %}
## Measure
{% for annotation in annotations %}{% if annotation.color == "#aaaaaa" %}
{{annotation.annotatedText}}[](zotero://open-pdf/library/items/{{annotation.attachment.itemKey}}?page={{annotation.page}}&annotation={{annotation.id}})
{{annotation.comment}}
{% endif %} {% endfor %}
## Written
{% for annotation in annotations %}{% if annotation.color == '#ffd400' %}
{{annotation.annotatedText|replace(":","")|replace(";","")}}---
Application:
Part:
Purpose:
Other:
***Example***:: *{{annotation.annotatedText}}*[](zotero://open-pdf/library/items/{{annotation.attachment.itemKey}}?page={{annotation.page}}&annotation={{annotation.id}})
***Description***:: {{annotation.comment|replace("🔤","")}}
***Before***::
***Next***::
```dataview
list
from [[]] and "6000 Written/6900 Bank/Phrase bank"
```、
{% endif %} {% endfor %}
这篇推送就到这里啦。这其实称不上一篇教程,只是我个人的经验分享。我并没有涉及插件的基本设置和markdown的基本知识,因为这个部分网上教程真的非常非常多了,我很难通过只言片语的文字给大家传递到位,所以就当是给已经在使用OBsidian的小可爱们一些新思路吧。
如果大家有好用的技巧也欢迎与我分享呀!